Wednesday 10 December 2014

Millicent gets an Upgrade to 5 Axis

I made the decision to add a 5th Axis to my Minitech Minimill 2 as a hobby project. 

I bought a second hand Minitech 5th axis trunnion table unit from fellow forum member Stewy, and assigned a little time each weekend to work on it.
The initial arrival was a worry as it looked far to big for my table.. but it worked out ok.

The BEFORE shot:

4th Axis off... Tool Probe off, XY table ready to fit the trunnion.

This position is the only way it will fit and still allow access to the tool probe.


Cutting forward of the table is impossible.. but the back 120degree of A and teh full 360 of B will suffice


The wiring!!:
I solved my 5V issue by using an external PS 5V 1000ma. It is wired it to a plug socket so that swop out will be easy if this dies (see white plug point wired in the back)
From the initial layout to get motion, the task of fitting it all in the original controller box seem daunting.. but a beer later it was solved.. sometimes resolving an issue requires walking away from it and coming back..


And its all in... Again a very tight fit..

I mounted the B driver board to left of the main 48V power supply


I wired it to the only space left, above the power inlet.

and all assembled and running! (still need to solve the A and B limit wiring)
And the Burn in running!!!
[video=youtube;R2eZlWv7vYA]https://www.youtube.com/watch?v=R2eZlWv7vYA[/video]
(one week later)
The scripting in Mach is complete and we have home and probe on all the axis and setting up all the G54 offsets


and after some dialling in she got her first wax!!


And finally she is cutting! (one week later)


and that outcome!


Thursday 25 April 2013

My youngster having a go! budding jeweller!

I told him I would do the cad if he did all the preperation work of the wax and the finishing, coring etc..

they both picked a ring, Oldest picked LOTR the ONE RING and the younger picked the Green Lantern Ring. I drew both and today the oldest took his hand to it!


then the fun part!


Monday 22 April 2013

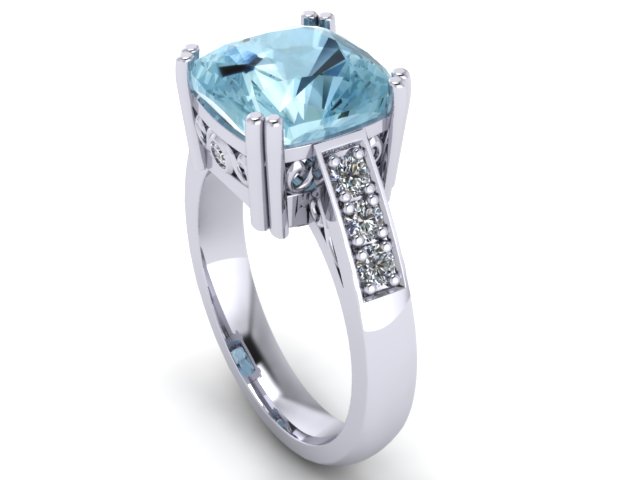
Evelyn's Ring

A simple design, slim, elegant. with some nice pink diamonds in the sides.

Happen to have the work flow here so posting.


The Finished Setting: and the manufacturing
 The Cad: The Wax:

Saturday 20 April 2013

Making music with your Mill.

WARNING WARNING WARNING! 

Before reading further, you can and will seriously break your equipment if you do not know what you are doing. Continuing further requires :

1: Some degree of understanding of Python Code  (really just how to edit out changes)
2: A good degree of understanding soft limits and zeroing on your CNC
3: The ability to load and run code outside of your OEM structure (revo/roland/haas etc)

you will need

1: Download script at http://tim.cexx.org/?tag=midi2cnc
2: Download Python 2.7 at http://www.python.org/download/releases/2.7/
3: download midi files to play with. avoid files with "beats"

On my Minitech I had to edit out a line, #181, I simply deleted it from the script, and the script requires a few inputs to be changed before you run it. If it seems daunting , its not, think of it as  a really fancy batch file. I have outlined the basics in this video

(those who just wanna hear cool Midi music on a mill skip to next 4 videos.)


GodFather Theme

Star Wars Imperial March T

Tetris

Mario Brothers

Monday 1 April 2013

DeskProto JWX - Minitech wizard convert

Hey all, still a WIP but getting great results already :)

I had some time on my hands (easter weekend) and me mate Joe had an idea.. lets re-script the Deskproto JWX wizard to work for our Minitechs....

Firstly this is info on how that script works.. its a LONG video, so executive summary is

1: Take geometry, port to DeskProto
2: Run JWX wizard which automatically offsets for all fixtures
3: Wizard sets up and calculates AutoFlip + Rotary.

Really a fast way to do mundane pathing. Here is that video for original JWX. Great work Lex!


Those of us with Mach2/3 mills with decent Omron switches dont have to jump through all those hoops the Roland device has to.. we simply setup G54 after a physical tram and software "dial" so the basis of this wizard works VERY well for us!

The translation of the details was been mildly tedious because it requires quite a bit of coding, but its been relatively hassle free because Lex documents his wizards very well!

As it stands the wizard has been altered to work "normally" ie: no fixtures and no fixed X offsets for the rotary paths, X has been set to 0 so it will work with whatever fixture offset you have for your own arbour. (in my case Brants) and it works PERFECTLY, first test cuts done!

More info on upcoming fixture below :)

This is the wizard at 95% done, a few tweak left to get it looking neat, an exchange of graphics and some final tweaking of pathing values.

Changes:

1: Changed arbor geometry and cutouts to represent "Brants arbour"
2: Entire job but with one cutter, including hub hole
3: Roughing on flips changed from linear to radial (much faster)
4: Null code to operations 1:5 1:6 1:7 (using to cutoff supports, next change)
5: Removed all X offsets for rotary passes (see point 11)
6: Changed code to reflect that X offset as a variable for the before/after code throughout
7: Changed the chaining orders since we using one cutter right around
8: Changed rotary final method to skip total ambient
9: Reduced minumum width from 8 to 6mm for Brants arbour
10: Lots and lots and lots of tweaks like changing the hardcoded Roland mm/sec to mm/min
11: (in my video I use a g54, my X offset is not required but will re add)

The pathing section


and the cuts in order

Flip Cut

Rotary in process

and DOne!

So essentially that is a practical working carcass.. a few niceties like I said, some graphics etc..

Joe and myself are working on a strapon fixture similar to few already on the market and then refinishing this wizard to suit it, the fixture has a base plate thta fits to your table, this base gets shimmed and trammed to suit your machine then the fixture couples to it, and a OldHam coupling will fix it to your rotary to eliminate and runout..


Basically after that put it on, take it off, do what you like it will stay true..


Sunday 24 March 2013

Sugar Skull in 3D Coat and TSplines.

A bit of fun while learning 3D Coat.

The Renders:


and a turntable of a shiny one :)

The process:

Thursday 21 March 2013

Full Circle Fun :)

A cad job with a few views.

1: The stl mesh view, you need Chrome Browser and give it a second to load, then have a play with my model ;)


and some renders


and the finished article.

Friday 8 March 2013

The machine killer!

The mission objective was to build a part that could be arrayed and copied to bring rhino to the very edge of my ram ceiling.. then to render it and see if it would crash.. also to test render engines.. never to be made..

BUT, my wife said she wants it.. sooooooooooooo.. a happy wife, is a happy life...

the 3d object below the images is 25mb big, be patient with it loading if you want to play with this part in 3d.


Mr NippleEyes, a scanned mesh

Dug these files up for someone, took me back a bit, figured id share ;)

At the very bottom is a 3D viewer, give it a second to load and have a play ;)

I scanned a kids lucky packet toy to test my scanner. 


and this is the mesh


Thursday 7 March 2013

Testing GrabCad Share Model.

If this works then there should be a ring under the video that you can grab and rotate in 3d..


RhinoRing/DeskProto/Minitech script

Hey all, been working on a little project to automate my daily chores.

basically my workflow is to start with CAD, then export the cad to my CAM and then cut on CNC.

The CAD part is always evolving, new designs, new ideas etc.. and the CNC part is pretty much mundane and quick to handle, but the cam part can often be a boring chore.. lots and lots of reptitive input to do the same things over and over.. a ONE BUTTON solution was my answer..

So.. I tried writing the scripts myself.. got close.. but no cigar, so I enlisted the help of Kieth Reffel, of www.cadwax.com to write them for me. and at this point we are at proof of concept, first part completed from the click of a button.. skip first video if you not into the technical aspects of the setups, watch last two.

The OLD way..
the initial command test
and the first test run, success!
and the proof of the pudding..

Wednesday 20 February 2013

Some rendering fun :)


Be sure to click on the little gear thingo on the bottom of the youtube clip and select 480P or 720P

or see same clips on our facebook page at 


and a simple GIF


 Hope you enjoy!